
Discovering a new culinary treasure can be magical. It connects you to another culture’s traditions. My first time trying traditional mochi was at a small Japanese restaurant. The chewy texture took me to a world of amazing flavors and skill.
Now, I’m excited to share a homemade mochi butter recipe. It turns your kitchen into a Japanese culinary haven. This traditional mochi recipe takes only 30 minutes and promises a delightful experience.
Making mochi is more than just baking a dessert. It’s about embracing a centuries-old tradition that unites people. Whether you’re a curious home cook or a Japanese cuisine lover, this recipe will help you make a gluten-free treat that’s both simple and extraordinary.
Ready to explore the world of homemade mochi? Each bite tells a story of cultural heritage and culinary innovation. Let’s start this delicious journey together!
Table of Contents
Understanding Traditional Japanese Mochi
Mochi is a beloved part of Japanese culture. It’s a sweet treat that has been loved for centuries. Its unique texture and deep meaning make it special.
Making mochi is more than just a recipe. It’s a way to connect with your heritage. It brings families together through tradition and symbolism.
Cultural Significance of Mochi in Japan
Mochi is key in Japanese celebrations. During New Year, families make mochi together. This tradition, called mochitsuki, is a special bonding time.
“Mochi is more than food; it’s a connection to our cultural roots.” – Traditional Japanese saying
Types of Traditional Mochi
Mochi comes in many forms, each with its own story:
- Daifuku: Soft mochi filled with sweet red bean paste
- Kagami Mochi: A New Year decoration
- Hishi Mochi: A Girl’s Day treat
- Bota Mochi: Linked to Buddhist holidays
Modern Adaptations of Mochi
Today, chefs are making mochi in new ways. They’ve turned it into mochi ice cream and even “raindrop cake.” These creations show how versatile mochi can be.
| Mochi Type | Cultural Significance | Flavor Profile |
|---|---|---|
| Daifuku | Traditional dessert | Sweet bean paste |
| Mochi Ice Cream | Modern fusion | Multiple flavors |
| Kagami Mochi | New Year celebration | Symbolic offering |
Whether you love cooking or exploring cultures, mochi is a treat. It offers a peek into Japan’s rich food culture.
Essential Ingredients for Perfect Mochi
Making mochi starts with picking the right ingredients. The key is glutinous rice mochi flour. It makes the mochi chewy and soft.
Here are the main ingredients for making mochi:
- Glutinous Rice Flour (Mochiko): The heart of mochi, giving it a chewy feel
- Granulated Sugar: Adds sweetness and helps with the mochi’s texture
- Milk: Adds moisture and richness
- Cornstarch: Used to prevent sticking
Choosing top-notch ingredients is key for great-tasting mochi. Mochiko flour is essential for a true Japanese mochi taste.
| Ingredient | Quantity | Purpose |
|---|---|---|
| Mochiko Flour | 16 oz (450g) | Creates chewy texture |
| Granulated Sugar | 2 cups (400g) | Adds sweetness |
| Whole Milk | 2 cups (16 fl oz) | Provides moisture |
| Cornstarch | 2-3 tablespoons | Prevents sticking |
“The secret to perfect mochi lies in the quality of your ingredients and the precision of your technique.”
Pro tip: Use room temperature ingredients for the best mochi. This ensures a smooth batter that turns into delicious mochi.
Kitchen Tools and Equipment Needed
Making delicious Japanese rice cake needs the right tools. Start your mochi journey by picking the best utensils for a smooth cooking process.
Essential Tools for Making Mochi
To cook mochi, you’ll need a few key tools:
- Microwave-safe mixing bowl
- Measuring cups and spoons
- Plastic wrap
- Silicone spatula
- Cutting board
- Sharp knife
- Cornstarch or potato starch for dusting
Alternative Equipment Options
Don’t worry if you don’t have special mochi-making tools. Creativity can replace expensive tools. You can use a steamer or rice cooker as alternative.
“The right tools make mochi-making easier, but passion and technique matter most.” – Japanese Culinary Wisdom
Preparation Setup Tips
Before starting, set up your workspace:
- Clear a clean, spacious counter area
- Gather all ingredients beforehand
- Ensure your tools are clean and dry
- Wear comfortable, loose clothing
- Have a small bowl of water nearby for sticky hands
Pro tip: Dust your work surface with cornstarch. It prevents mochi from sticking and makes shaping easier.
Mochi Butter Recipe: Step-by-Step Guide
Explore the world of butter mochi, a favorite Hawaiian dessert. It mixes Japanese mochi with creamy textures. This recipe is great for home bakers wanting a tasty treat.

- 16 oz (1 box) mochiko flour
- 2 cups granulated sugar
- 4 large eggs
- 1/2 cup melted unsalted butter
- 1 can (12 oz) evaporated milk
- 1 can (14 oz) coconut milk
- 2 tsp vanilla extract
- 2 tsp baking powder
This recipe takes about 1 hour and 25 minutes. You’ll spend 25 minutes preparing and 1 hour cooking. It makes about 24 servings.
“Butter mochi is more than just a dessert – it’s a cultural celebration of Hawaii’s diverse culinary heritage.”
Here are the main steps:
- Preheat your oven to 350°F (175°C)
- Grease a 9×13 inch baking pan
- Mix dry ingredients (mochiko flour, sugar, baking powder) in a large bowl
- Whisk wet ingredients separately
- Combine wet and dry ingredients until smooth
- Pour mixture into prepared pan
- Bake for 50-60 minutes until golden and set
- Cool completely before cutting
Pro tip: For the best texture, serve your butter mochi within a few days of baking and store it in an airtight container.
This gluten-free dessert is versatile. Try adding ube, matcha, or chocolate to make it your own!
Mixing and Cooking Techniques
Making mochi from scratch needs careful mixing and cooking. You must know the key steps to turn simple ingredients into a tasty Japanese treat.
Learning to make mochi starts with getting the dough right. It should be smooth, elastic, and lump-free. Experts say mixing well and heating carefully are key.
Proper Dough Consistency
Your mochi dough should have certain qualities:
- Smooth and stretchy texture
- No visible dry flour particles
- Uniform color throughout
- Slight shine when properly mixed
Cooking Methods Compared
| Cooking Method | Pros | Cons |
|---|---|---|
| Microwave | Quick and convenient | Uneven heating possible |
| Steaming | Traditional method, even cooking | Longer preparation time |
| Stovetop | Good temperature control | Requires constant stirring |
Temperature Control Tips
Temperature is key in making mochi. Consistent heat is vital for the right texture and to avoid burning. Use medium-low heat and stir often to keep the heat even.
“The secret to perfect mochi is patience and precise temperature management.” – Traditional Japanese Cooking Wisdom
Remember, practice is key to mastering mochi. Each try will help you get better at this delightful Japanese treat.
Shaping and Filling Your Mochi
Learning to shape mochi takes time and effort. The right texture is key to making great mochi. First, dust your work area and hands with cornstarch to avoid sticking.

Your mochi recipe comes to life when you shape it. Here are the main steps to make tasty mochi:
- Divide the dough into equal-sized portions
- Flatten each portion into a thin, round disc
- Place your chosen filling in the center
- Carefully pinch and seal the edges
Choosing the right filling can make your mochi special. Here are some popular options:
| Traditional Fillings | Modern Variations |
|---|---|
| Red bean paste | Ice cream |
| Sweet potato | Chocolate ganache |
| Fruit preserves | Nutella |
“The secret to perfect mochi is in the gentle handling of the dough” – Traditional Japanese Cooking Wisdom
Pro tip: Use cornstarch or glutinous rice flour to handle the sticky mochi. Gentle movements and patience are key to creating beautiful, delicious mochi.
Storage and Preservation Methods
Keeping your homemade mochi dessert fresh is key. The right storage methods can keep your mochi treats perfect in texture and taste.
Short-Term Storage Solutions
After making your mochi, it’s important to store it right. Place it in an airtight container at room temperature for up to 2 days. Make sure the container is in a cool, dry spot to avoid moisture.
- Use a sealed plastic container
- Separate layers with parchment paper
- Avoid direct sunlight
Freezing Instructions
Freezing is a great way to keep your mochi dessert for longer. Wrap each mochi in plastic wrap to stop freezer burn and keep its soft texture.
| Storage Method | Duration | Recommended Technique |
|---|---|---|
| Room Temperature | Up to 2 days | Airtight container |
| Refrigerator | Up to 1 week | Sealed container |
| Freezer | Up to 1 month | Individually wrapped |
Reheating Guidelines
When you thaw frozen mochi, be gentle. Let it thaw at room temperature for the best results. Or, use the microwave carefully. Heat in short 5-10 second bursts to get the soft, chewy texture back without overcooking.
Pro Tip: Dust your mochi with cornstarch before storing to prevent sticking and maintain its delightful texture.
Tip: Always handle your homemade mochi with care to preserve its unique texture and flavor.
Flavor Variations and Customization Options
Exploring the world of soft mochi opens up endless possibilities for creativity in your kitchen. You don’t have to stick to traditional recipes. You can turn this delightful treat into a canvas for unique flavor combinations.
Let’s dive into some exciting flavor customization options that will elevate your soft mochi experience:
- Tropical Twist: Add shredded coconut to your mochi dough for a tropical flavor profile
- Nutty Delight: Insert a dollop of peanut butter in the center before shaping
- Chocolate Lover’s Dream: Mix cocoa powder into the dough for rich chocolate mochi
- Matcha Magic: Incorporate 1 teaspoon of matcha powder for a green tea sensation
When experimenting with sweet mochi flavors, keep these tips in mind:
- Start with small quantities of additional ingredients
- Maintain the original mochi texture while introducing new flavors
- Balance sweet and savory notes carefully
“Mochi is not just a dessert, it’s an art form of flavor and texture.” – Japanese Culinary Tradition
Your soft mochi can become a delightful canvas for culinary creativity. Whether you prefer subtle flavor hints or bold taste explosions, there’s a mochi variation waiting for you to discover!
Common Mistakes to Avoid
Making perfect mochi takes practice and focus. Even skilled cooks face challenges that affect the mochi’s texture and quality.
Texture Troubles in Mochi Making
The texture is key in mochi-making. You might run into problems like:
- Sticky dough that’s hard to work with
- Dry, crumbly mochi that breaks easily
- Uneven texture in your batch
Solving Mochi Handling Challenges
Experts say preventing sticking is key. Here’s how to handle mochi texture:
- Use lots of cornstarch
- Work with cold, damp hands
- Let the dough rest between kneading
“Patience and technique are the secret ingredients to perfect mochi texture.”
Temperature and Technique Tips
| Problem | Solution |
|---|---|
| Sticky Mochi | Dust with potato starch |
| Dry Mochi | Add small amounts of water while kneading |
| Uneven Cooking | Use consistent heat and rotate during preparation |
Mastering mochi-making is a journey. Each batch teaches you something new about handling this delicate Japanese treat.
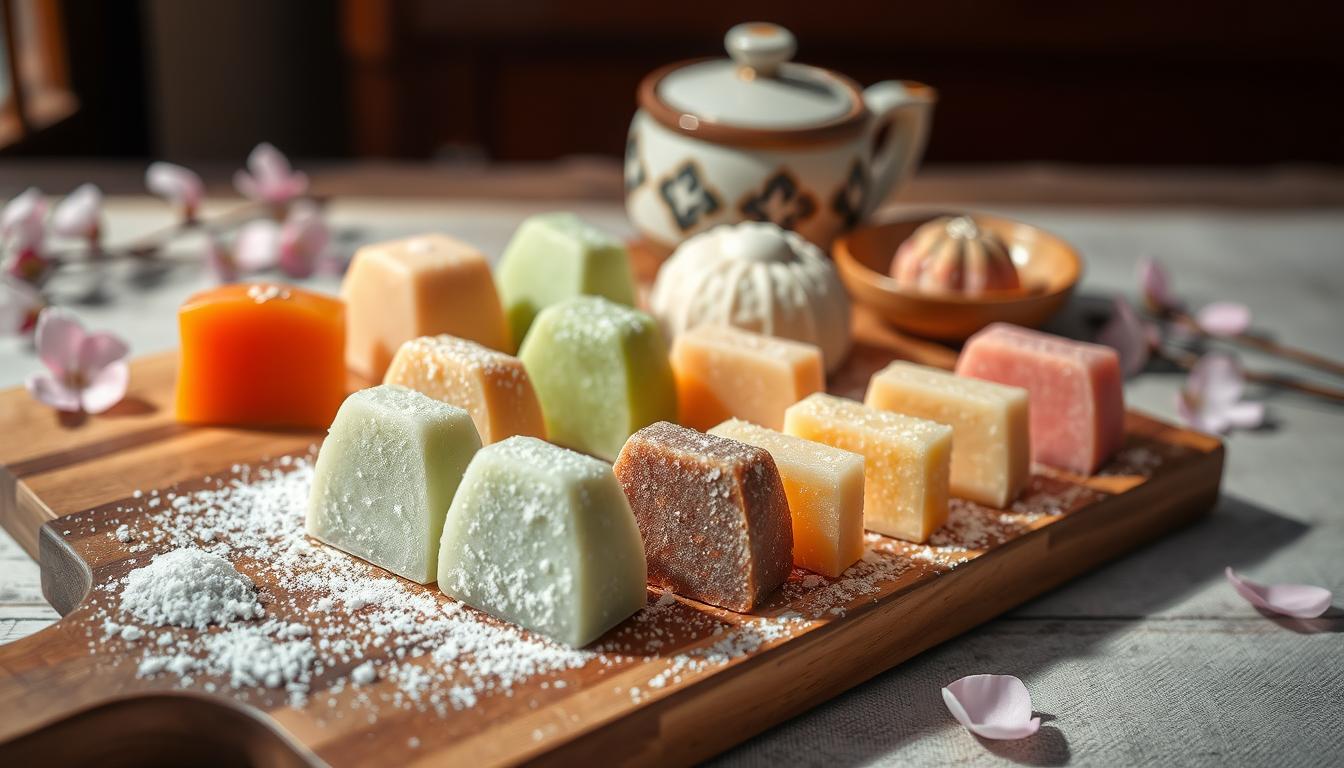
Serving Suggestions and Presentation Ideas
Make your Japanese rice cake recipe stand out with creative serving ideas. These ideas turn a traditional treat into a stunning dish. Mochi desserts can impress anyone, from casual snackers to food lovers.
Here are some exciting ways to serve your homemade mochi:
- Create an elegant dessert platter with multiple mochi flavors
- Dust mochi with kinako (roasted soybean flour) for authentic Japanese styling
- Pair mochi with complementary beverages like green tea or matcha latte
- Use fresh fruit garnishes to add color and freshness
Temperature is key in presenting mochi. Serve chilled mochi for a firmer texture. Or, let it sit at room temperature for 1-2 minutes for a softer feel.
“Presentation transforms a simple mochi dessert into a culinary art form.” – Japanese Culinary Expert
For a stunning look, arrange mochi on a beautiful ceramic plate. Add mint leaves and a light dusting of powdered sugar. You can also wrap small ice cream scoops in mochi for a unique twist.
- Recommended serving temperature: 40-45°F
- Best accompaniments: Whipped cream, fresh berries
- Ideal serving size: 2-3 pieces per person
Remember, presentation is everything. Your mochi dessert should be as beautiful as it is delicious!
Conclusion
Your adventure with traditional mochi has just begun. Making homemade mochi is more than following a recipe. It’s about connecting with a rich culinary heritage that spans generations. The techniques you’ve learned will empower you to create delightful treats that capture the essence of Japanese cuisine.
From understanding the cultural significance to mastering the art of texture and technique, you now possess the skills to craft delicious traditional mochi in your own kitchen. The versatility of this treat allows for endless creativity. Whether you’re exploring classic flavors or experimenting with innovative variations like coconut or chocolate mochi.
Remember that practice makes perfect. Each time you prepare homemade mochi, you’ll refine your technique and develop a deeper appreciation for this beloved culinary tradition. Don’t be afraid to experiment with different fillings, flavors, and techniques—your journey into the world of mochi is just beginning.
Embrace the joy of creating something authentic and delicious. Your newfound skills in preparing traditional mochi will undoubtedly impress family and friends. Turning a simple recipe into a memorable culinary experience.